Leopard Print Brioche Bread: wildly delicious!
- Fla Bet

- Sep 22, 2020
- 4 min read
Updated: Apr 13, 2021
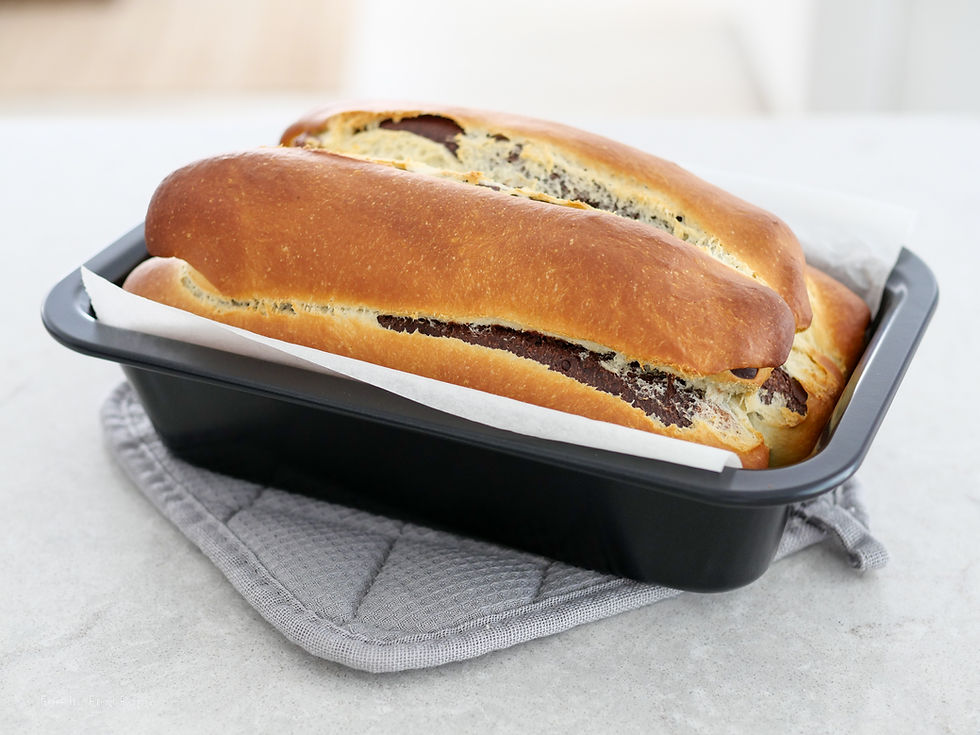
This brioche bread is ferociously good looking. It is also so much fun making it! The best part is when you cut the first slice and you see all those beautiful leopard spots! Trust me, this bread knows how to WOW people!
It's fluffy and tasty, plain brioche bread with chocolate and coffee flavoured spots. Wildly delicious!

Recipe
How much time do you need?
Preparation time: 1 hr 20 min
Cooking time: 40 min
Proofing time: 2 hrs
Total time: 4 hrs
Material:
Loaf pan
Spatula
Stand mixer (or your hands)
2 lts bowl
Small and medium bowls
Small whisker
Cutlery
Kitchen towels
Cling wrap (film)
Baking paper
Rolling pin
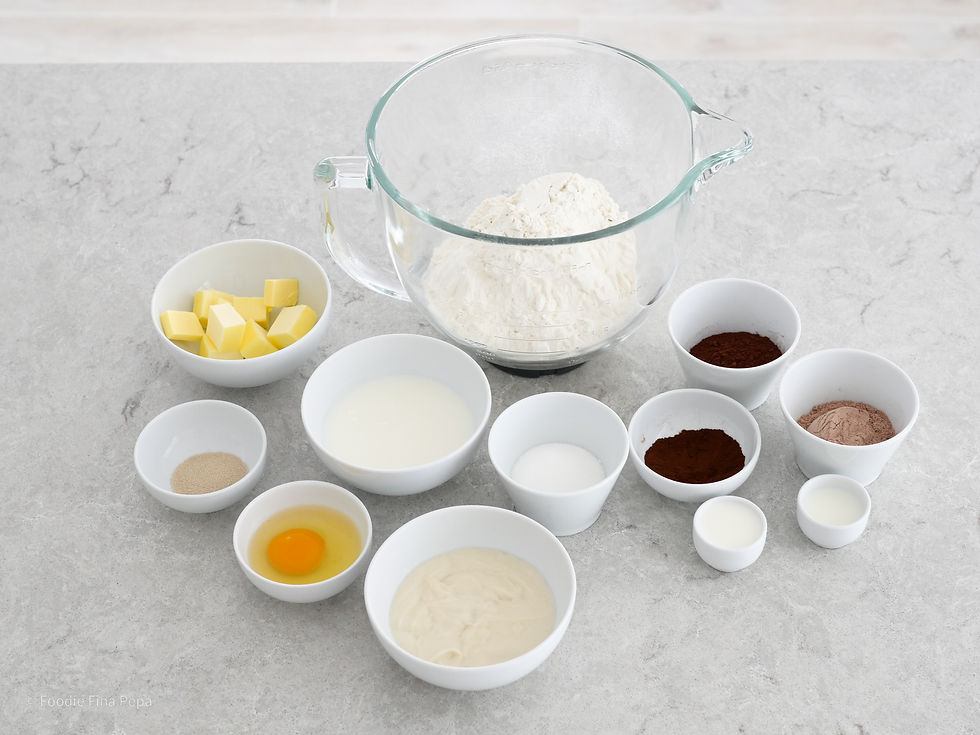
Ingredients
For the bread starter: This will make the crumb softer and fluffier
25 grs bread flour
60 ml cup whole milk
60 ml water
For the bread dough:
320 grs bread flour '00'
55 grs cup white sugar
3 grs teaspoon salt
1 egg (at room temperature)
125 ml warm whole milk (15 secs in microwave if it was refrigerated)
60 grs unsalted butter, at room temperature (20 secs in microwave if it was refrigerated)
1 packet active dry yeast (8 grs)
For colouring the light brown spots:
35 grs cup cocoa powder
1 tablespoon milk
For colouring the dark brown spots:
35 grs dark cocoa powder
8 grs teaspoons espresso powder
1 tablespoon milk

Method:
Make the starter:
In a small saucepan, whisk together flour, milk and water. Bring to a simmer, whisking continuously until mix has thickened, about 6 to 8 minutes. Pour into a small heatproof bowl, cover with plastic wrap and set aside to cool slightly. It should reach at least ~30°C before using it.
Make the bread dough:
In a large bowl, combine flour, sugar, yeast and salt, and mix well. Add the egg, milk (~30°C) and cooled starter mix (~30°C or less, otherwise you risk killing the yeast). Knead the mixture until it comes together, and continue for another few minutes. Add butter and knead for another 10 to 15 minutes until the dough becomes uniformly smooth. It's always better to knead this dough with a standing mixer as the step of integrating the butter can be tricky. You can use your hands if you don't have a standing mixer. You might think 'it's not coming together, it's not coming together!!' but be patient, it will do. See the pictures below.
When you have obtained a smooth and not too sticky dough, divide the dough into two parts. Take one part and divide in the, one half of the size of the other one. You should end up having 3 dough balls of increasing size.
Roll the largest portion into a smooth ball and place it in a buttered bowl. Cover with plastic wrap.
Incorporate the cocoa powder and 1 tablespoon of milk into the remaining larger piece, kneading in an electric mixer until you obtain a uniform light brown color. Adjust with an additional half a teaspoon of milk if it's too dry. Place into a buttered bowl then cover with plastic wrap and let it proof.
Incorporate the dark cocoa and espresso powder with a tablespoon of milk into the remaining dough ball, kneading well until you have a uniform dark brown color. Adjust milk if it's too dry. Form the dough into a smooth ball, place into a buttered bowl, then cover with plastic wrap.
If you are using a stand mixer, mix on medium speed until combined. Stop the mixer, scrape down the dough using a spatula a knead for another minute. Repeat until the colour is well distributed and the texture of the dough is consistent.
Let all three doughs to proof until they have approx. doubled in size, about 50 minutes at 25-28 degrees Celsius.
If you live in a cold place or you’re in the middle of winter, you can create a 'homemade proofing area':
Use the oven with the door cracked open, the light will create an environment of around 25 to 30 degrees C.
Use an old-fashioned incandescent bulb. They heat up the surrounding area really quick, also reaching temperature of around 25 to 32 degrees C.
Butter a 30 cm loaf pan or line it with baking paper.
Once the doughs have doubled, remove each dough ball from its bowl one at a time and punch it down to release the air. Portion each ball of dough into 8 equal parts, forming the parts into smooth balls and then covering all of the dough with plastic wrap to keep it moist.
Take a light dough ball and roll it out into a small rectangle, taking care not to allow any air to become trapped inside. Next take a dark brown dough ball and roll it into a small rectangle, as long as the light one. Take a light brown ball and form a log of the lenght of the rectangles. Place the light brown log one on top of the dark one and wrap it. Wrap the final log into the light rectangle and place it in the baking pan (see sequence in below pictures). When all dough is rolled into logs, cover the loaf pan in plastic wrap (very lighlty, you don't want that the film sticks to your dough), set a sheet pan on top and set aside to rise for another 50 minutes. Halfway through the proof, preheat oven to 170 degrees C.
I sometimes take a very small piece of dark brown dough and make very small logs which I randomly place among the bigger logs. This will create random small spots and it will make the leopard dots look more natural. See pictures below.
When dough has risen again, remove the sheet pan and plastic wrap (carefully), brush the top of the loaf with whole milk and bake for 35 to 40 minutes. When loaf is done, remove from the oven and allow to cool in the pan for about 10 minutes, then turn out loaf and finish the cooling process on a wire rack for at least one hour before slicing. Enjoy!


Now it's time for a coffe... :)


Comments